03 Mar Musculoskeletal (MSK) Diagnostic Ultrasound Video Series
CME AccreditED for 8 Hours category 1 credit

It is important for providers to have a “roadmap” for each anatomical region so that ultrasound studies are performed accurately and systematically every time. Learning the roadmap in conjunction with proper ultrasound technique definitely has a learning curve which requires repetition to master.
In R3’s exciting MSK Diagnostic Ultrasound Video Series, you will learn exactly how to evaluate the following areas of the body with ultrasound. The examinations are performed in real time, with R3’s expert Registered MSK Ultrasound Faculty Richard Kates narrating.
CME Accredit for 8 Hours category 1 credit
Here are the Learning Objectives:
- Introduction Video
- Hip – Five Videos
- Knee – Two Videos
- Shoulder – One Comprehensive Video
- Foot/Ankle – Four Videos
- Elbow – Four Videos
- Hand/Wrist – Two Videos
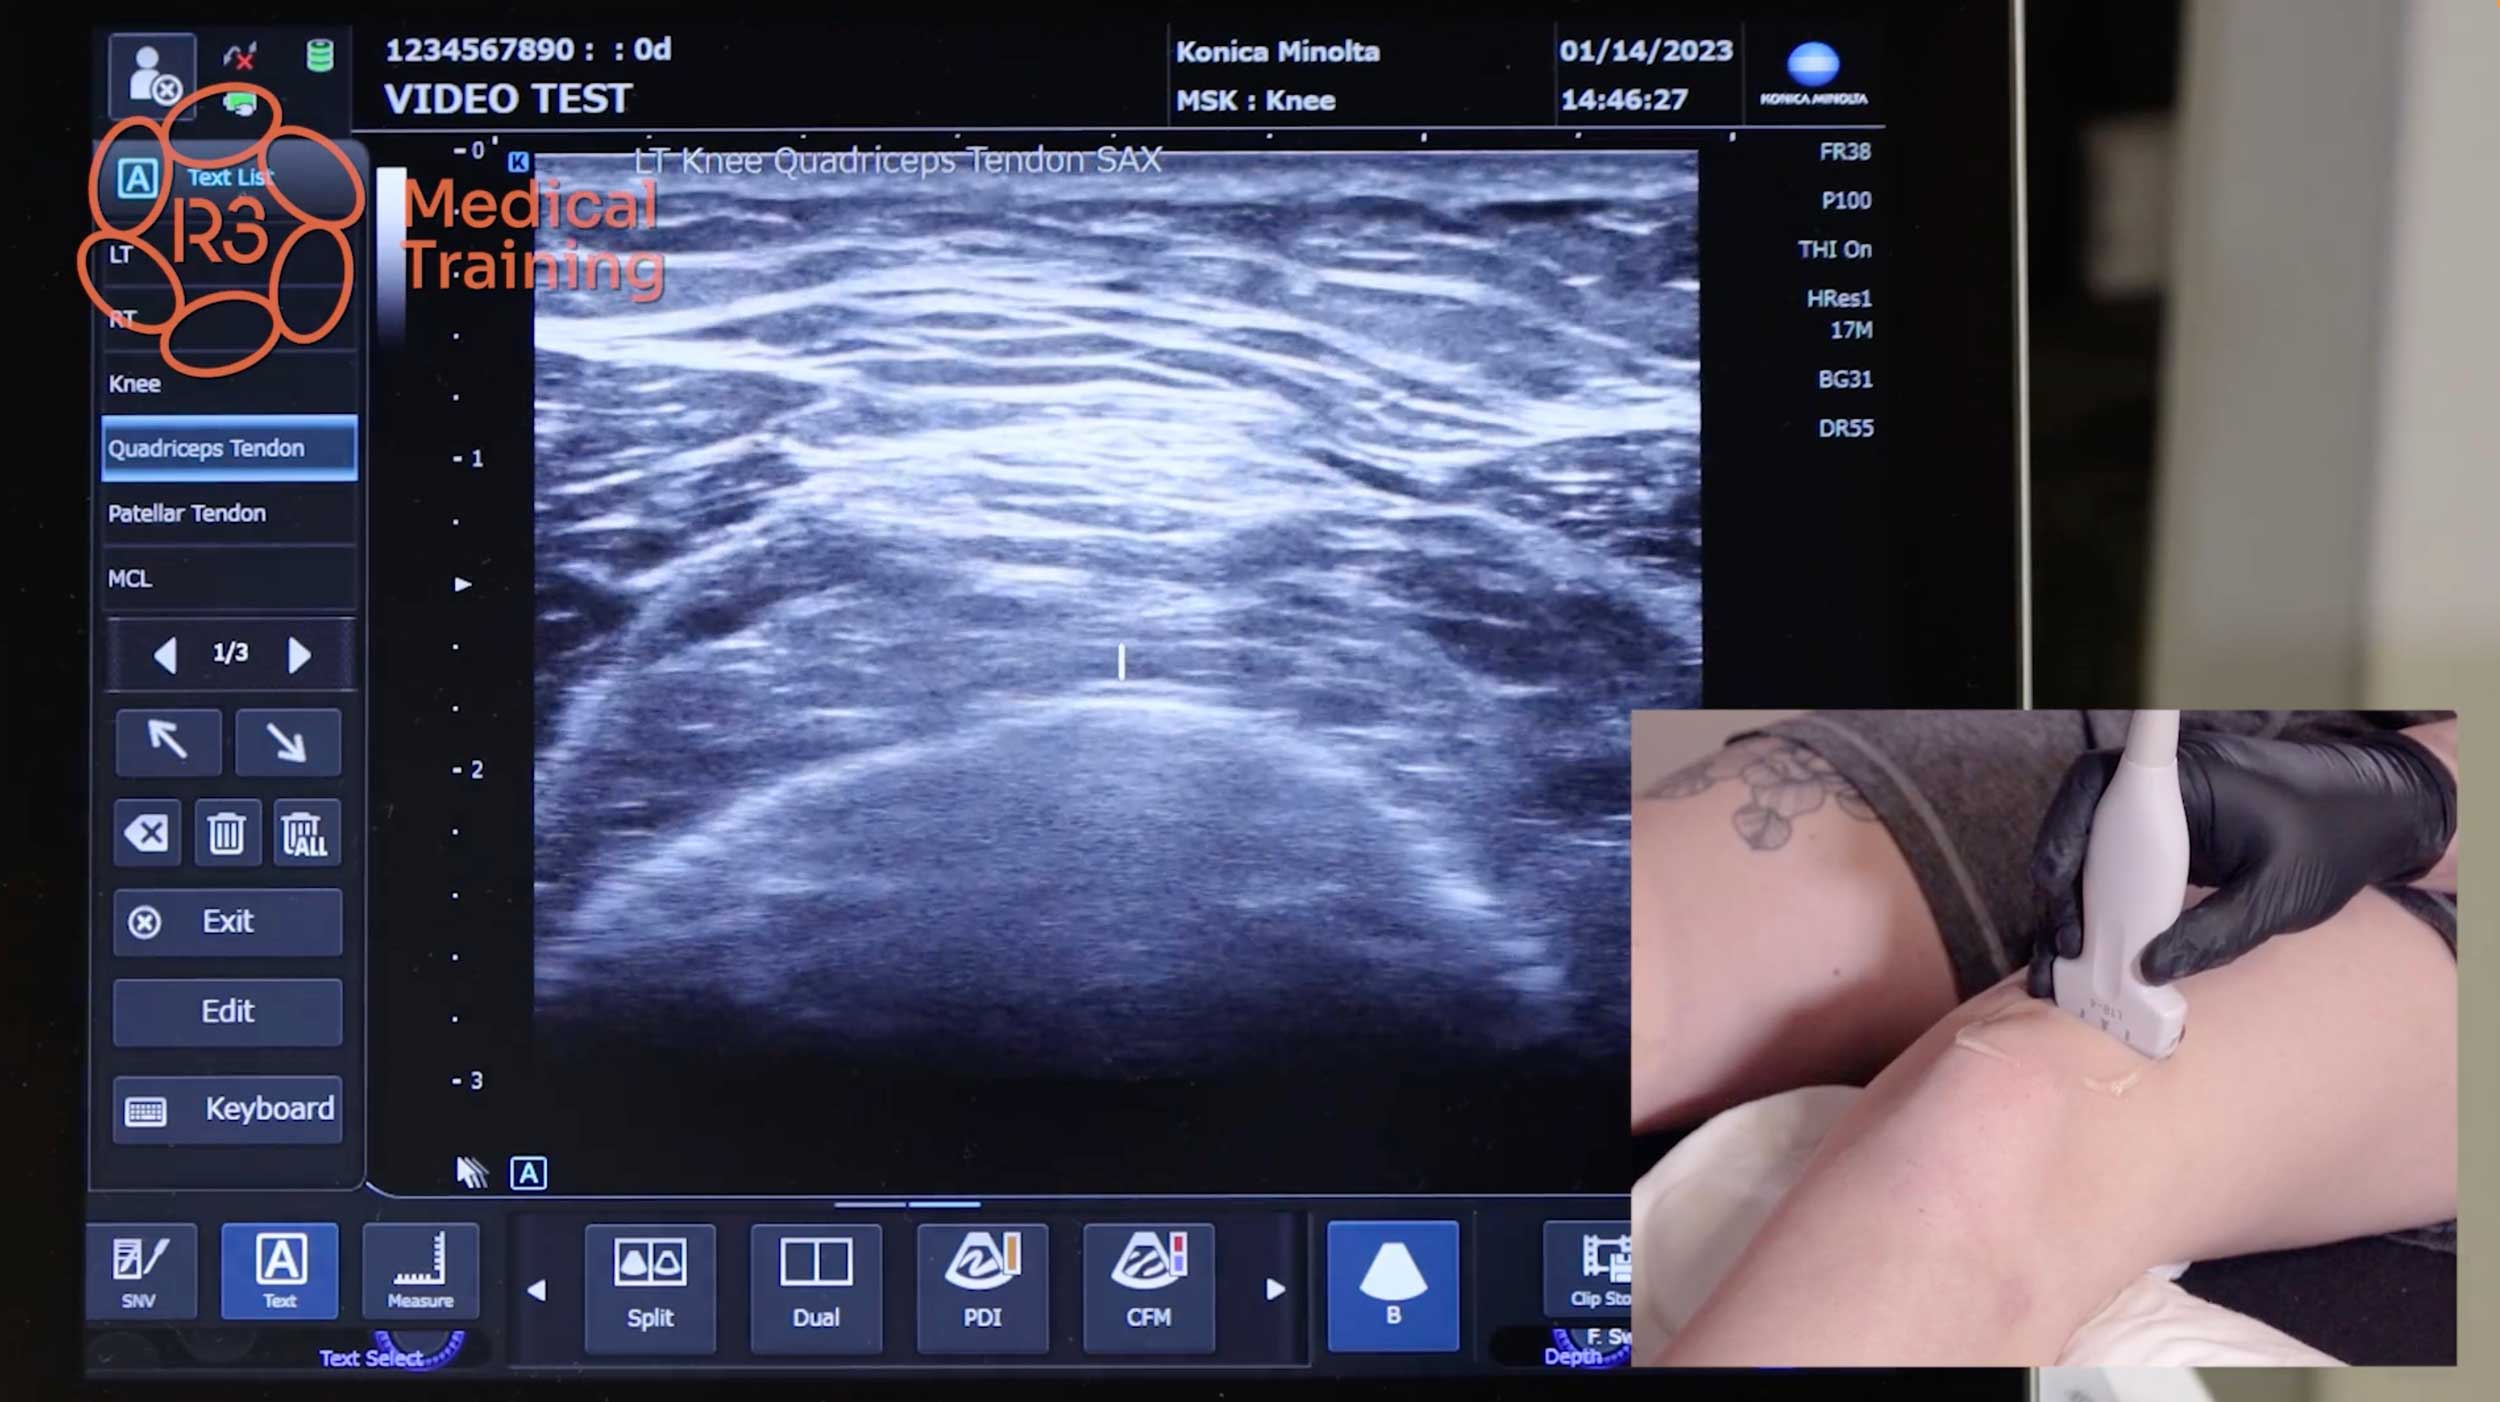
In this video, attendees will learn how to systematically perform a diagnostic ultrasound examination including the anterior, lateral and medial anatomical regions of the knee.
Attendees will first learn which probe to use and proper settings for the ultrasound machine.
Attendees will learn how to evaluate the following anatomical structures and decide normal versus abnormal findings:
1. Quadriceps tendon – Vastus Medialis, Vastus Lateralis, Vastus Intermedius, Rectus Femoris Patella, Femur, Tibia
2. Patellar tendon
3. Medial Joint line – Med meniscus, MCL, pes anserine and bursa, femoral condyle, tibial plateau
4. Lateral – popliteal fossa, popliteus, lat femoral condyle, lat tibial plateau, lat meniscus, LCL, IT band, Gerdys Tubercle, biceps femoris
In this video, attendees will learn how to systematically perform a diagnostic ultrasound examination including the posterior knee anatomical regions.
Attendees will first learn which probe to use and proper settings for the ultrasound machine.
Attendees will learn how to evaluate the following anatomical structures and decide normal versus abnormal findings:
1. Baker’s Cyst
2. Posterior Med/Lat Joint lines – Femoral condyles
3. Medial Joint Line – Semimembranous, Medial Head Gastroc
4. Lateral Joint Line – Biceps Femoris, LCL Posterior NV structures
In this video, attendees will learn how to systematically perform a diagnostic ultrasound examination including the anterior hip anatomical regions.
Attendees will first learn which probe to use and proper settings for the ultrasound machine.
Attendees will learn how to evaluate the following anatomical structures and decide normal versus abnormal findings:
1. Femoral Head
2. Neck and Shaft
3. Iliopsoas Ligamentos Complex
4. Acetabulum
5. AIIS and 2 heads of rectus femorus
6. ASIS
7. Sartorius
8. Conjoined Tendon of Iliopsoas
In this video, attendees will learn how to systematically perform a diagnostic ultrasound examination including the medial hip anatomical regions.
Attendees will first learn which probe to use and proper settings for the ultrasound machine.
Attendees will learn how to evaluate the following anatomical structures and decide normal versus abnormal findings:
1. Pubis
2. Adductor Longus, Adductor Brevis, and Adductor Magnus
3. Conjoined tendon made up of rectus abdominus, abductor longus
In this video, attendees will learn how to systematically perform a diagnostic ultrasound examination including the lateral hip anatomical regions.
Attendees will first learn which probe to use and proper settings for the ultrasound machine.
Attendees will learn how to evaluate the following anatomical structures and decide normal versus abnormal findings:
1. Greater Trochanter
2. Greater Trochanteric Bursa
3. IT Band
4. Gluteus Medius and Minimus
5. Conjoined tendon of Gluteus Maximus and TFL (forms IT Band)
6. Piriformis
7. Sciatic Nerve
In this video, attendees will learn how to systematically perform a diagnostic ultrasound examination including the posterior hip anatomical regions.
Attendees will first learn which probe to use and proper settings for the ultrasound machine.
Attendees will learn how to evaluate the following anatomical structures and decide normal versus abnormal findings:
1. Hamstring muscles including semimembranosus (SM), semitendonosis (ST) and biceps Femoris (BF)
2. Ischial tuberosity
3. Conjoined tendon including semimembranosus (SM and semitendonosis (ST).
In this video, attendees will learn how to systematically perform a diagnostic ultrasound examination including the pelvic hip anatomical regions.
Attendees will first learn which probe to use and proper settings for the ultrasound machine.
Attendees will learn how to evaluate the following anatomical structures and decide normal versus abnormal findings:
1. Symphysis Pubis
2. Pyramidalis Muscles
3. Rectus Abdominis Muscles
4. Athletic Pubalgia Evaluation
In this video, attendees will learn how to systematically perform a diagnostic ultrasound examination including the shoulder anatomical region.
Attendees will first learn which probe to use and proper settings for the ultrasound machine.
Attendees will learn how to evaluate the following anatomical structures and decide normal versus abnormal findings:
1. Biceps Tendon
2. Deltoid Muscle
3. Transhumeral Ligament
4. Humerus
5. Rotator Cuff
6. Greater Tuberosity
7. Acromioclavicular (AC) Joint
8. Distal Clavicle
9. Acromion
In this video, attendees will learn how to systematically perform a diagnostic ultrasound examination including the anterior elbow anatomical region.
Attendees will first learn which probe to use and proper settings for the ultrasound machine.
Attendees will learn how to evaluate the following anatomical structures and decide normal versus abnormal findings:
1. Biceps tendon
2. Brachialis
3. Brachioradialis
4. Pronator Teres
5. Brachial Artery
6. Median Nerve
7. Trochlea and Capitellum
8. Radial Nerve
9. Arcade of Froshe
In this video, attendees will learn how to systematically perform a diagnostic ultrasound examination including the lateral elbow anatomical region.
Attendees will first learn which probe to use and proper settings for the ultrasound machine.
Attendees will learn how to evaluate the following anatomical structures and decide normal versus abnormal findings:
1. Common extensor tendon
2. Radial Collateral Ligament
3. Radial Nerve into Superficial and Posterior Interosseus Nerve
4. Arcade of Froshe
In this video, attendees will learn how to systematically perform a diagnostic ultrasound examination including the medial elbow anatomical region.
Attendees will first learn which probe to use and proper settings for the ultrasound machine.
Attendees will learn how to evaluate the following anatomical structures and decide normal versus abnormal findings:
1. Common Flexor Tendons
2. Ulnar Collateral Ligament (Anterior/Posterior Bands)
3. Ulnar Nerve
4. Medial Epicondyle
In this video, attendees will learn how to systematically perform a diagnostic ultrasound examination including the posterior elbow anatomical region.
Attendees will first learn which probe to use and proper settings for the ultrasound machine.
Attendees will learn how to evaluate the following anatomical structures and decide normal versus abnormal findings:
1. Triceps tendon
2. Olecranon Fossa
3. Olecranon Fat Pad
4. Olecranon Bursa
In this video, attendees will learn how to systematically perform a diagnostic ultrasound examination including the dorsal wrist anatomical region.
Attendees will first learn which probe to use and proper settings for the ultrasound machine.
Attendees will learn how to evaluate the following anatomical structures and decide normal versus abnormal findings:
1. The dorsal 6 compartments:
a. Abductor Pollicis Longus (APL) and Extensor Pollicis Brevis (EPB)
b. Extensor Carpi Radialis Longus (ECRL) and Extensor Carpi Radialis Brevis (ECRB)
c. Between #2 and #3 = Lister’s Tubercle
d. Extensor Pollicis Longus (EPL)
e. Extensor Indicis Proprius EIP and Extensor Digitorum Communis (EDC)
f. Extensor Digiti Minimi (EDM)
g. Extensor Carpi Ulnaris (ECU) and Triangular Fibrocartilage Complex (TFCC)
2. Scapholunate joint
3. Metacarpophalangeal (MCP) joint
4. Distal Interphalangeal (DIP) joint
5. Proximal Interphalangeal (PIP) joint
In this video, attendees will learn how to systematically perform a diagnostic ultrasound examination including the volar wrist anatomical region.
Attendees will first learn which probe to use and proper settings for the ultrasound machine.
Attendees will learn how to evaluate the following anatomical structures and decide normal versus abnormal findings:
1. Median Nerve
2. Flexor Retinaculum
3. Palmaris Longus
4. Carpal Tunnel
5. Flexor digitorum profundus (FDP)
6. Flexor Digitorum Superficialis (FDS)
7. Flexor Pollicis Longus (FPL)
8. Flexor Carpi Radialis (FCR)
9. Guyons canal
10. Ulnar Nerve and Artery
11. Ulnar Collateral Ligament of Thumb
12. A1, A3, A5 Pulleys
13. Metacarpophalangeal (MCP) joint
14. Distal Interphalangeal (DIP) joint
15. Proximal Interphalangeal (PIP) joint
In this video, attendees will learn how to systematically perform a diagnostic ultrasound examination including the anterior ankle anatomical region.
Attendees will first learn which probe to use and proper settings for the ultrasound machine.
Attendees will learn how to evaluate the following anatomical structures and decide normal versus abnormal findings:
1. Anterior Tibialis
2. Anterior Tibiotalar joint
3. Extensor hallucis longus (EHL)
4. Extensor digitorum longus (EDL)
5. Dorsal pedal pulse
6. Dorsal, Distal Metatarsophalangeal (MTP) joints
7. Distal Interphalangeal (DIP) joint
8. Plantar Metatarsophalangeal joints (MTP joints)
In this video, attendees will learn how to systematically perform a diagnostic ultrasound examination including the medial ankle anatomical region.
Attendees will first learn which probe to use and proper settings for the ultrasound machine.
Attendees will learn how to evaluate the following anatomical structures and decide normal versus abnormal findings:
1. Posterior tibialis
2. Flexor Digitorum Longus
3. Flexor Hallucis Longus
4. Neurovascular structures
5. Knot of Henry
In this video, attendees will learn how to systematically perform a diagnostic ultrasound examination including the lateral ankle anatomical region.
Attendees will first learn which probe to use and proper settings for the ultrasound machine.
Attendees will learn how to evaluate the following anatomical structures and decide normal versus abnormal findings:
1. Peroneus Longus
2. Peroneus Brevis
3. Calcaneofibular Ligament (CFL)
4. Anterior Talo-Fibular Ligament (ATFL)
5. Anterior-inferior Tibiofibular ligaments (AITFL)
In this video, attendees will learn how to systematically perform a diagnostic ultrasound examination including the posterior ankle anatomical region.
Attendees will first learn which probe to use and proper settings for the ultrasound machine.
Attendees will learn how to evaluate the following anatomical structures and decide normal versus abnormal findings:
1. Plantar Fascia
2. Fat Pad
3. Distal Calcaneus
4. Achilles Tendon
5. Retrocalcaneal bursa
6. Kager’s Fat Pad
7. Soleus
8. Flexor Hallucis Longus
9. Medial Gastrocnemius
10. Triceps Surae
With R3 Medical Training’s Comprehensive MSK Diagnostic Video Series, you will achieve the repetition necessary to master the extremity “roadmap”. The engaging videos show the ultrasound screen with an overlay of the probe so you will know which probe is being used and the placement during each scan.


Sorry, the comment form is closed at this time.